• Skip to primary navigation
  • Skip to main content
  • Skip to primary sidebar
  • Skip to footer

Sheila Cantonwine

  • Home
  • About Me
  • Blog
    • 4th Grade Math
    • 5th Grade Math
    • 6th Grade Math
    • Back to School
    • Boom Cards
    • Classroom Organization
    • Digital Resources
    • Holidays
    • Math Test Prep & Review
    • Summer Math
    • Teacher Self Care
  • Shop
    • Teachers Pay Teachers
    • Amazon
    • Boom Learning
  • Affiliates
  • Contact
  • Navigation Menu: Social Icons

    • Email
    • Facebook
    • Instagram
    • Pinterest

Digital Resources

3 Ways to Plan Lessons with Digital Planners

March 9, 2022 by Sheila Cantonwine

Lesson Planning with Digital Calendars and Planners

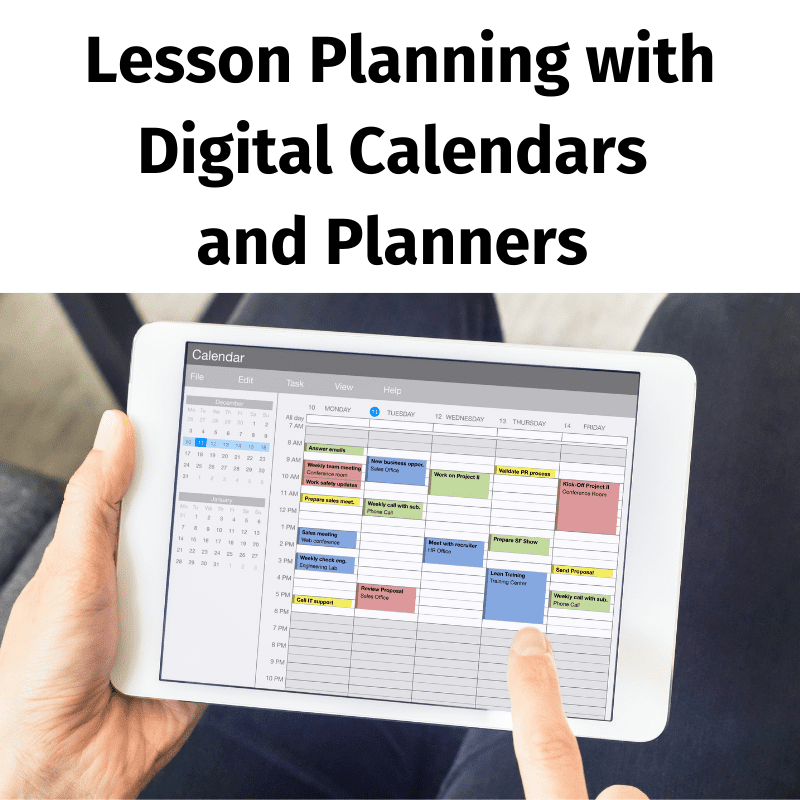
There are so many advantages to doing your lesson planning with digital calendars and planners. I found 3 ways to plan lessons with digital planners but there are many other options as well.

Using digital calendars and planners in the classroom is great for organizing all your lesson plans. You can print them and handwrite all your lesson plans with your favorite flair or gel pens. Or you can keep them digital and type your lesson plans in PowerPoint or Google Slides.

Digital planners are also great for keeping records of your previous year’s lesson plans. You’ll always have a digital record of your plans from year to year to refer to for upcoming years. You can even copy and paste from one year to the next.

Administrators are also requesting digital copies of lesson plans more and more since the pandemic. Using digital planners is a great way to easily submit your lesson plans weekly, monthly, quarterly or yearly.

You might also be interested in Tips and Tricks for Editing Your Digital Calendar and Planner

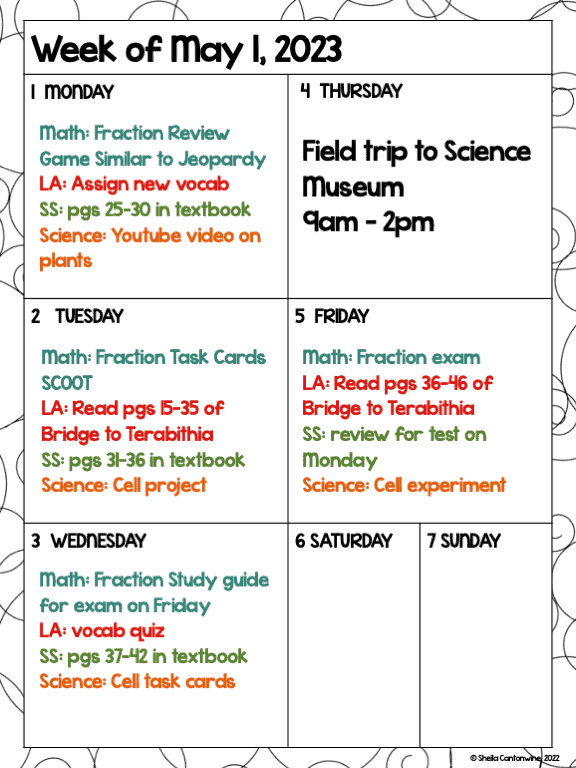
1. One Week Over Two Pages

3 Ways to Plan Lessons with Digital Planners

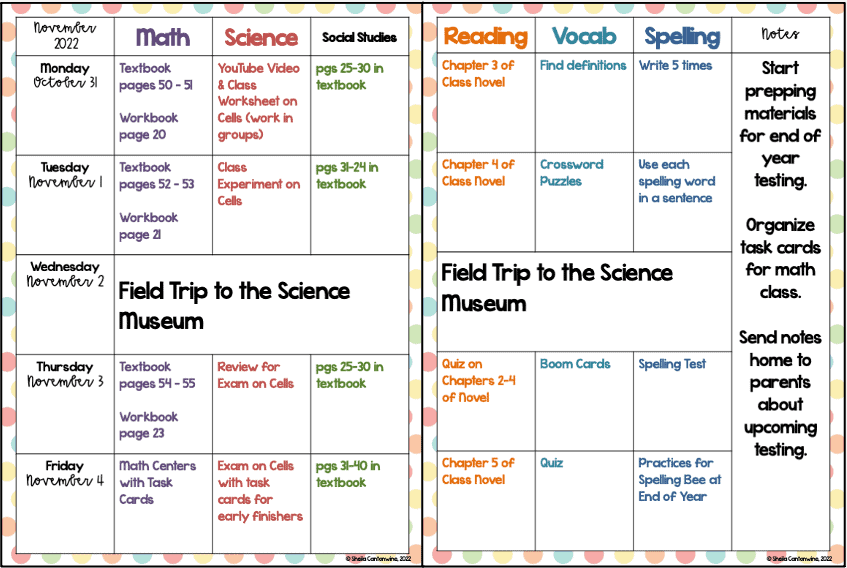
This is one of my favorite ways to write lesson plans. There is room for all the blocks in your day. The layouts are very flexible. For elementary school, you can use the different blocks for the subjects that you teach each day. For middle school, you can use the different blocks for the classes that you have.

I love color-coding everything so it’s easier to visualize too. For me, I color code by subject but it’s flexible in the colors you choose. You’ll be looking at your planner all day, every day, so customize it for you.

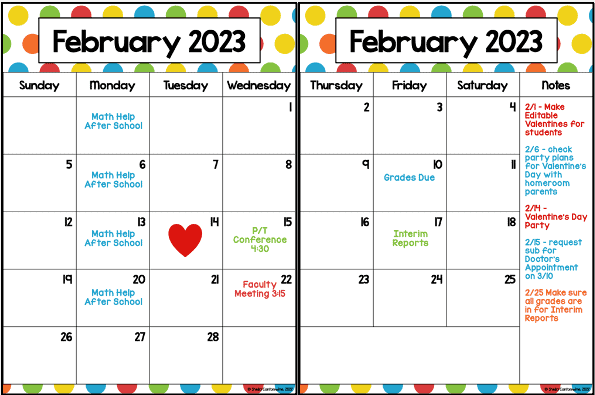
2. One Week Over One Page

3 Ways to Plan Lessons with Digital Planners

If you like to see one week at a time then maybe this layout is the one for you. You have plenty of room to type or handwrite your lesson plans for the week. Plus, you can color-code your subjects or classes as I did here.

Each day has a little less room (maybe a line or two) compared to the one week over two pages. Keep that in mind if you have a lot to write or type on your lesson plans.

When you use digital planners, you can customize your colors and fonts to make them personalized for you. I love changing fonts and colors every year just to switch things up a bit.

3. One Month Over Two Pages

3 Ways to Plan Lessons with Digital Planners

I love using this for lesson planning when I have recurring entries like math help, lunch duty, or faculty meetings. With digital planners, you can easily copy and paste the same entry to multiple days in a matter of minutes.

I love to use digital stickers and clipart where I can. It makes my planner personalized and it makes me happy to see those little touches.

These are just a few options for lesson planning with your digital planners. If you’re interested in checking out these planners, click on the images below to see more. You can also reach teacher reviews and see how others are using these in their classrooms.

As an added bonus, these calendars and planners update every year for free. When you purchase these from my store, you’ll be able to download future years at no additional cost to you. If you’re interested in new designs or layouts, please contact me. I love product requests and I love hearing from my fellow teachers.

I hope these 3 Ways to Plan Lessons with Digital Planners have been helpful for you. Best wishes as you plan your lessons!

Filed Under: Classroom Organization, Digital Resources Tagged With: Digital calendars, Digital Planners, teacher calendar, teacher planner, using digital planners in the classroom

5 Tips For Marketing And Advertising Your Boom Cards

February 15, 2022 by Sheila Cantonwine

5 Tips for Marketing and Advertising Your Boom Cards

Once you have spent lots of time creating and publishing your wonderful Boom cards, you want to make sure that teachers see them. That’s where marketing and advertising your boom cards come in. I’ve learned over the years to incorporate my marketing efforts into the product creation process. That way, you can start advertising and marketing your new creations as soon as they’re published.

Here are 5 tips I recommend for marketing and advertising your Boom cards:

1) Create a Video Preview for Your Product Listing on TpT

I like to create short videos, about 2 minutes long, that show the Boom cards being used. Once I have the videos in place, I can use them for the video preview on Teachers Pay Teachers (TpT). Teachers can then see all the Boom cards and what their students will be expected to do. You can check your TpT dashboard to see how many people are viewing your video previews just to see if they are being viewed. I’ve learned over the years that it has really helped with marketing.

If you can show that the Boom cards are self-correcting that will really help. Teachers are so pressed for time and having digital resources that are automatically graded can save precious time. Students also enjoy having resources that are self-correcting because they have instant feedback which helps them learn from their mistakes.

Below, you can find the video preview that I created for my Boom card listing on TpT for 2 Digit by 2 Digit Multiplication Boom Cards.

Here’s an example of a video preview I have for this product on TpT

If you’d like more information about creating video previews, check out my Course on Marketing and Advertising Your Boom Cards.

2) Use the video for Instagram and Facebook posts

Once you’re comfortable creating video previews of the Boom cards in action, you can easily use those videos to create Instagram or Facebook posts. I like to use the Tailwind scheduler for this because it creates and schedules both Instagram and Facebook posts for me. Here’s an example of an Instagram post that I used a video for. It was a much better way for me to show the product in action rather than only having one static image of the Boom cards.

3) Create Pins for Pinterest

Pinterest is still my best marketing tool for my business. Whenever I create a new deck of Boom cards, I try to create 2 new pins. The first pin is a static pin that I can use for my Tailwind Communities and to schedule to Tailwind. The second pin that I create is a video pin. I use the video that I created for the video preview then just embed it into a pin template using Canva. Both types of pins have been really successful for driving traffic to both my TpT and Boom Learning stores.

Here’s an example of the video pin I created for a recent product. Here’s an example of the static pin I created for the same product.

4) Optimize Your Product Listing on TpT

When people ask about marketing their products, I also suggest they take a look at their product listings on TpT. It’s important to have everything in place so teachers have as much information as they can before buying your Boom cards.

To optimize your product listing I suggest you have:

  • An eye-catching product cover. It’s helpful to have the Boom logo on the cover and mention that they are self-correcting digital task cards
  • A preview with the Boom Preview link in place. Boom learning provides this link so people can view the first 4 cards in your deck. It’s a great marketing tool because they get to try before they buy.
  • Thumbnail images that showcase the product and any unique features you may have
  • Searchable title. Something like “Fun in the Sun Boom Cards” won’t be searched as much as “Summer Themed Multiplication Boom Cards”
  • Product Description. Include what the students will be expected to do and how many Boom cards are included. There is also some information from Boom Learning that you should include in your product description too.

5) Optimize Your Product Listing on Boom Learning

Although the platforms are different, it’s equally important to optimize your product listing on the Boom Learning website.

To optimize your product listing I suggest you have:

  • An eye-catching product cover. Since you don’t need to have the Boom logo or mention that they are digital task cards, this give you more room to showcase your Boom cards. For example, if I have a deck that covers all 5 strands of math standards, I might show all 5 of those Boom cards rather than just one.
  • Provide helpful information in your details page. This includes your the grades, keywords, subject, and product description which is found in “about”. For the product description, I like to include what the student will be asked to do. For example, are the questions multiple choice, drag and drop, or will they be expected to type the answers.
Marketing and Advertising Your Boom Cards

I hope these suggestions are helpful. To find out more about marketing your Boom cards, check out my course Marketing and Advertising Your Boom Cards on TpT.

Filed Under: Courses, Digital Resources Tagged With: Advertising Boom Cards, Boom cards, Marketing Boom Cards, Selling Boom Cards, Video Preview for Boom Cards, Videos of Boom Cards

4 Fun Ways to Test Prep and Review for 6th Grade Math

January 25, 2022 by Sheila Cantonwine

6th Grade Math Review while preparing for End of Year exams can be super stressful for students and teachers too.  Especially with all the craziness of the pandemic these last couple of years.

Ideally, you want to cover all the topics before the exam while making sure the students feel confident and not overwhelmed.  From the student’s perspective, you want to make the review engaging and fun.  Using the same materials over and over again can be boring for students. It can also be very stressful if they struggle with taking standardized tests. 

Trying different types of review will make test prep fun for your students. You will also gain valuable knowledge on what math topics they are confident with and what topics need to be reviewed. Here are 4 Fun Ways to Test Prep for 6th Grade Math.  

1. PLAY AN INTERACTIVE GAME FOR 6TH GRADE MATH REVIEW

6th Grade Math Review Games for Test Prep and End of Year Review

Students love playing games and these are perfect for 6th Grade Math Review. They are a fun way to review and students can also learn to collaborate and play well with other students. Digital games are particularly fun because they’re interactive.  

One example is this PowerPoint game that is played similar to Jeopardy.  Students form teams, nominate a team captain, then work through all 50 questions to review all the topics in 6thgrade math.  Each question has the common core alignment so teachers can take note of which questions might cause students to struggle.

The questions for this game are also editable which means you can use them for additional activities.  After playing the game once, many teachers assign questions to different teams, then create a totally new set of questions for a totally new game.  Students enjoy writing the questions and it’s a great way to extend the review to multiple days.

2. USE PRINTABLE TASK CARDS FOR EARLY FINISHERS, SCOOT, OR AROUND THE ROOM

6th Grade Math Task Cards for Test Prep and End of Year Review

Printable task cards are a great activity for 6th Grade Math Review. They’re interactive and students can either work individually or with a partner.  Some teachers print these at the beginning of the year then use them for early finishers throughout the school year.

Scoot and Around the Room are fun because students get to move around the classroom a little.  With scoot, you would put 1 or 2 task cards on each desk then students scoot from desk to desk to answer the questions.  Around the room is similar except you place the task cards all over your classroom.  Walls, the floor, the door, windows, all make great places to tape the task cards.  Then students have to find the card, like a scavenger hunt, before they can answer the questions.

I usually laminate the cards so they last a little longer.  Students record their answers on recording sheets and it’s really easy to grade with the answer key.  You can even have students grade their own recording sheets then go back and try the questions they missed again.

3. SELF-CORRECTING DIGITAL TASK CARDS ON BOOM LEARNING FOR 6TH GRADE MATH REVIEW

6th Grade Math Boom Cards for Review and Test Prep

I love using digital task cards because they’re interactive, self-paced, and can even track student data. These are probably the easiest for teachers to use because everything is digital which means no printing, laminating, cutting, or storing the task cards.  Plus, you can either play them in person in the classroom or as a remote learning activity which makes them really versatile.

With certain memberships on Boom Learning, you can also track student data.  This makes it super easy to see which questions are most missed by your students so you can review and reteach before the big test.

If you are new to digital task cards or want more information about how to use Boom cards in your classroom, check out this article on 6 Reasons to Use Boom Cards in Your Classroom. You can also learn how to make your own Boom cards to sell on Teachers Pay Teachers and the Boom Learning website.

4. PRINTABLE WORKSHEETS SIMILAR TO A PRACTICE TEST

6th Grade Math Worksheets for Test Prep and End of Year Review

Worksheets with multiple-choice questions are always valuable because they are most similar to the test that your students will most likely take for their end-of-year exam. Worksheets give them practice with multiple-choice questions, they cover all the topics for 6th grade math and also have the common core alignment for each question. 

I have found that this review can be intimidating for students sometimes so it might be best to break this up with a page or two per day rather than the entire set of worksheets.

If you are a 6th grade math teacher, this would also be a great pre-test for your students at the beginning of the school ear to see how much information they retained over the summer break.


SAVE WITH THE BUNDLE FOR 6TH GRADE MATH REVIEW

6th Grade Math Review and Test Prep Bundle

I hope you find all of these suggestions helpful for your math test prep in your 6th grade class.  If you are interested in using all four types of review, try the Math Test Prep Bundle for 6th Grade Math Review. 

It has a couple of weeks worth of review materials with completely different questions to keep your students engaged in the test prep season.

Filed Under: 6th Grade Math, Digital Resources, Test Prep and Review Tagged With: 6th Grade Math, 6th Grade Math End of Year, 6th Grade Math Review, 6th Grade Math Test Prep

4 Fun Ways to Test Prep and Review for 5th Grade Math

January 24, 2022 by Sheila Cantonwine

4 Fun Ways to Test Prep and Review for 5th Grade Math

5th Grade Math Review while preparing for End of Year exams can be super stressful for students and teachers too.  Especially with all the craziness of the pandemic these last couple of years.

Ideally, you want to cover all the topics before the exam while making sure the students feel confident and not overwhelmed.  From the student’s perspective, you want to make the review engaging and fun.  Using the same materials over and over again is tiresome for students and can be very stressful if they struggle with taking standardized tests. 

Trying different types of review will make test prep fun for them and you’ll gain valuable knowledge on what information they are confident with and what needs to be reviewed. Here are 4 Fun Ways to Test Prep for 5th Grade Math. 

1. PLAY AN INTERACTIVE GAME FOR 5TH GRADE MATH REVIEW

5th Grade Math Games Similar to Jeopardy

Students love playing games and these are perfect for 5th Grade Math Review. They are a fun way to review and students can also learn to collaborate and play well with other students. Digital games are particularly fun because they’re interactive.  One example is this PowerPoint game that is played similar to Jeopardy.  Students form teams, nominate a team captain, then work through all 50 questions to review all the topics in 5thgrade math.  Each question has the common core alignment so teachers can take note of which questions might cause students to struggle.

The questions for this game are also editable which means you can use them for additional activities.  After playing the game once, many teachers assign questions to different teams, then create a totally new set of questions for a totally new game.  Students enjoy writing the questions and it’s a great way to extend the review to multiple days.

2. USE PRINTABLE TASK CARDS FOR EARLY FINISHERS, SCOOT, OR AROUND THE ROOM

5th Grade Math Task Cards

Printable task cards are a great activity for 5th Grade Math Review. They’re interactive and students can either work individually or with a partner.  Some teachers print these at the beginning of the year then use them for early finishers throughout the school year.

Scoot and Around the Room are fun because students get to move around the classroom a little.  With scoot, you would put 1 or 2 task cards on each desk then students scoot from desk to desk to answer the questions.  Around the room is similar except you place the task cards all over your classroom.  Walls, the floor, the door, windows, all make great places to tape the task cards.  Then students have to find the card, like a scavenger hunt, before they can answer the questions.

I usually laminate the cards so they last a little longer.  Students record their answers on recording sheets and it’s really easy to grade with the answer key.  You can even have students grade their own recording sheets then go back and try the questions they missed again.

3. SELF-CORRECTING DIGITAL TASK CARDS ON BOOM LEARNING FOR 5TH GRADE MATH REVIEW

5th Grade Math Boom Cards for Test Prep and End of Year Review

I love using digital task cards because they’re interactive, self-paced, and can even track student data. These are probably the easiest for teachers to use because everything is digital which means no printing, laminating, cutting, or storing the task cards.  Plus, you can either play them in person in the classroom or as a remote learning activity which makes them really versatile.

With certain memberships on Boom Learning, you can also track student data.  This makes it super easy to see which questions are most missed by your students so you can review and reteach before the big test.

If you are new to digital task cards or want more information about how to use Boom cards in your classroom, check out this article on 6 Reasons to Use Boom Cards in Your Classroom. You can also learn how to make your own Boom cards to sell on Teachers Pay Teachers and the Boom Learning website.

4. PRINTABLE WORKSHEETS SIMILAR TO A PRACTICE TEST

5th Grade Math Worksheets for Test Prep and End of Year Review

Worksheets with multiple-choice questions are always valuable because they are most similar to the test that your students will most likely take for their end-of-year exam. Worksheets give them practice with multiple-choice questions, they cover all the topics for 5th-grade math and also have the common core alignment for each question. 

I have found that this review can be intimidating for students sometimes so it might be best to break this up with a page or two per day rather than the entire set of worksheets.

If you are a 6th grade math teacher, this would also be a great pre-test for your students at the beginning of the school ear to see how much information they retained over the summer break.


SAVE WITH THE BUNDLE FOR 5TH GRADE MATH REVIEW

5th Grade Math Review and Test Prep Bundle

I hope you find all of these suggestions helpful for your math test prep in your 5th grade class.  If you are interested in using all four types of review, try the Math Test Prep Bundle for 5th Grade Math Review. 

It has a couple of weeks worth of review materials with completely different questions to keep your students engaged in the test prep season.

Filed Under: 5th Grade Math, Digital Resources, Test Prep and Review Tagged With: 5th Grade Math, 5th Grade Math Review, 5th Grade Math Test Prep

Creating Uncover the Picture Boom Cards

May 13, 2021 by Sheila Cantonwine 1 Comment

Creating Uncover the Picture or Hidden Picture Images

Have you ever seen those decks of Boom cards where there is a covered picture that students slowly uncover as they answer questions correctly? I call them Uncover the Picture Boom cards but sometimes they are also called Hidden Pictures, Mystery Pictures, or Covered Pictures. Students love these Boom cards because they’re interactive and allow students to do something fun while answering questions. Teachers love them because they are self-correcting and can track student data.

Have you ever wanted to learn how to create these Boom cards either for your students or to sell on Teachers Pay Teachers or Boom Learning? In this blog post, I’ll go through some of the steps you need to create these fun Boom cards.

Step 1 – Planning Your Uncover the Picture Boom Cards

The first and most important step is to plan your Boom cards. You’ll need to know the following information:

Example of 12 answer grid for Hidden Pictures Boom Cards
This is an example of a 12 answer grid
  • How many questions will there be? This can often depend on the age of the students and the difficulty of the question.
  • How many images will there be? You can offer either 1, 2, or 3 images for students to uncover. Most of my decks have 2 puzzles each with 12 questions for a total of 24 question.
  • Write out your questions and answers on the grid so you know the order that the questions will be. This is also helpful in figuring out which part of the image will be uncovered.
  • I go through the steps in a lot more detail in the Creating BOOM Cards Mini Course for Uncover the Pictures. I also include a helpful Worksheet for Creating Your Own Custom Sized Pictures, Answer Boxes & Answer Grids.

Step 2 – Designing Your Background Images

Example of Clipart and Background image for Hidden Pictures Boom Cards
In this example, I placed clipart on top of a background image to create the picture that will be uncovered.

There are a couple different options for your background images for these Hidden Pictures or Uncover the Pictures Boom Cards. This is the fun part where you get to be creative and make a unique background for the students. Here are some options for your background images:

  • Stock photos from your favorite site. Make sure you have permission to use them for commercial use.
  • Photos that you have taken yourself.
  • Clipart from Teachers Pay Teachers. Make sure the clip artist is on the Font and Clip Art Permissions Granted or Denied List for Boom Learning.
  • Background images with clipart on top.

Step 3 – Setting Up Your PowerPoint & Boom Card images

For PowerPoint, you’ll want to include the question for the student to answer, the background image, and the answer grid. You’ll want to order your slides in PowerPoint so that as students answer each question, the next slide has the correct answer removed. This will reveal part of the image underneath.

For Boom Learning, you’ll want to add answer boxes on top of each of the answers. When students click or tap the correct answer, the Boom card will advance to the next card with part of the picture revealed underneath.

Course Suggestion for Creating Uncover the Picture Boom Cards

Creating Boom Cards Mini Course for Uncover the Pictures

Some of the steps are a little more involved and can be a little complicated depending on how many questions you may have. It also depends on how much experience you have with PowerPoint and the Boom Learning platform.

If you’re interested in learning more about creating these Boom cards, I suggest you checkout the Creating BOOM Cards Mini Course for Uncover the Pictures. The course has 18 short videos that break the course down into easy to follow steps. You can download the videos and watch them at your own pace.

There are also 3 supporting documents that include everything you need to help the process go smoothly.

Here is what teacher authors are saying about the course…

“I loved this course. This is a complicated process but the step by step guide was extremely helpful and such a time saver!”

“I have used the information found in this course to make numerous products that have turned out PERFECTLY every single time! Thank you for the step-by-step easy to follow directions in your videos! You are the best!”

“Thank you so much for this mini course! It was worth every penny. I think I am officially addicted to creating these uncover the pictures. Your lessons were very thorough, and you made it very easy to follow along. The course was also very well organized so that if I needed to re-watch a video, it was really easy and quick to find.”

I hope these steps are helpful. If you have any questions, I’m always happy to help. Feel free to contact me through my blog or through the “Ask a Question” link on my TpT store.

Filed Under: Courses, Digital Resources Tagged With: Boom cards, Courses for TpT Sellers, Creating Boom Cards, Hidden Pictures Boom Cards, Making Boom Cards, Mystery Picture Boom Cards, Selling Boom Cards, Uncover the Picture Boom Cards

Creating Multiple Choice Options for Boom Cards

April 2, 2020 by Sheila Cantonwine 3 Comments

Creating multiple choice options for Boom Cards

Creating multiple choice options for Boom cards is a lot of fun! Check out this fun webinar I did with the folks at Boom Learning. Just click on the image above to see the webinar on You Tube. In the webinar you’ll learn how to create some basic boom cards with PowerPoint. Then I’ll show you how to upload them to the Boom Learning website. Finally, I’ll cover multiple choice options in Boom Learning. In addition to creating multiple choice options for Boom cards, you can also create fill in the blank, drag and drop, as well as a couple other options that make your Boom cards interactive for your students.

Creating Boom Cards Bundle

You might also be interested in my video course on Creating Boom Cards. The videos and checklist covers everything you need to start creating your own Boom cards to assign them to your students. You also have the option to sell them on Teachers Pay Teachers and the Boom Learning website.

Here are some of the other topics you’ll learn in the into course:

• Step 1 – Planning your BOOM Cards on Paper
• Step 2 – Creating PowerPoint Slides for Your BOOM Cards
• Step 3 – Uploading Images to BOOM Learning
• Step 4 – Multiple Choice Responses, Fill in the Blank Responses, Click the Correct Answer Responses, and Drag & Drop Responses
• Step 5 – Previewing the BOOM Cards
• Step 6 – Square Covers
• Step 7 – Completing the Details & Publishing BOOM Cards
• Step 8 – Teacher Notes for Teachers Pay Teachers (TpT) Listing
• Step 9 – Preview File
• Step 10 – Thumbnail Images
• Step 11 – Product Description
• Step 12 – Listing Your BOOM Cards on TpT

Here are the topics covered in the Advanced Course:

• Lesson 1 – Uploading Fonts to Boom Learning
• Lesson 2 – Custom Colors
• Lesson 3 – Using Sound with Your Voice Recordings and Free Sound Clips
• Lesson 4 – Video
• Lesson 5 – Fractions in Boom Learning and PowerPoint
• Lesson 6 – Flow Magic with Different Levels and Student Options
• Where to Go for Help

For more information about Boom Cards, check out my posts on Creating Boom Cards or 6 Reasons to Use Boom Cards in Your Classroom.

Filed Under: Courses, Digital Resources Tagged With: Boom cards, creating boom card, Making Boom Cards, multiple choice boom cards

Creating Boom Cards

September 24, 2019 by Sheila Cantonwine 19 Comments

Creating BOOM cards to sell on Teachers Pay Teachers and the BOOM Learning website is a great way to earn some extra income.  You can even use the Boom cards that you create in your own classroom.  

Why Use Digital Task Cards in the Classroom?

Creating BOOM Cards to Sell on Teachers Pay Teachers

Digital task cards are great in the classroom because they are interactive, self-correcting and can track student data. Teachers, you can save valuable time by not having to grade student work with the self-correcting features with Boom cards. Students love that they receive immediate feedback which means they can learn from their mistakes. They also love how interactive and fun they can be.

With more and more schools using digital and/or hybrid resources it’s also a great way to reach ALL your students when they’re in person or remote learning.

There are so many reasons that Boom cards can be helpful to you and your students. Check out the blog post 6 Reasons to Use Boom Cards in Your Classroom for other reasons that teachers and students love Boom cards.

If I Create Boom Cards, How Can I Sell Them?

If you want to try selling Boom cards, you can actually sell them two different places right now.  First, you can sell them on the Boom Learning website.  The second place to sell them is on Teachers Pay Teachers (TpT).  With 2 sources of income, it’s a great investment of your time.


How Do I Create Them?

I use these 7 easy steps for creating Boom cards to sell on Teachers Pay Teachers.

Creating Boom Cards to Sell on Teachers Pay Teachers

Step 1 – Planning your Boom Cards on Paper

This is something that’s easy to skip but planning your Boom cards on paper beforehand can save you a lot of time later on.  Because Boom cards are interactive, it helps to plan out the design, questions, and answers on paper.  For example, if your questions are multiple choice with 4 answers to choose from, it’s helpful to write out all 4 answer beforehand.  

Step 2 – Creating PowerPoint Slides & Uploading to Boom

When setting up Boom Cards for PowerPoint, you’ll need to have a specific size for your slide (7 inches wide by 5 inches high).  After you’ve created your Boom cards in PowerPoint you will also need to save each of the slides as an image file.  These images will become the background for the the new Boom cards on the Boom Learning website. After you’ve created your image files in PowerPoint you can then upload them to Boom Learning where you can set them as the background images for your Boom cards. 

Step 3 – Creating Answers 

 After you have the background images in place on your Boom cards, you need to add the interactive answers for students to select.  This is where the magic happens.  There are so many options for Boom cards including multiple choice with text, multiple choice with images, fill in the blank, click the correct answer, and drag and drop.  Making your Boom cards interactive is what students really love. 

You’ll also assign correct and incorrect answers so the Boom cards will be self grading.  This is great for students because they keep selecting until they find the correct answer.  The immediate feedback helps them learn from their mistakes.  It’s also helpful for teachers because they don’t have to do the grading.

Step 4 – Previewing the Boom Cards & Creating Covers

2 Digit by 2 Digit Multiplication BOOM Cards

It’s helpful to preview all the Boom cards a couple times just to make sure everything is correct.  Having a friend of colleague test the cards is also a great idea.  During the preview you can also grab screenshots of the Boom cards to use for your marketing. 

Both TpT and Boom Learning feature square covers for product listing.  These covers will look similar but the TpT cover needs to say “hosted on Boom Learning” and I also like to add that they are digital task cards.

Step 5 – Completing the Details & Publishing 

There are a few details you need to complete on the Boom Learning website including information about the grade level, keywords, subject, and a brief description of the Boom Cards.  The details also have the unique links for the preview and product download that you will need to include in your product file that teachers download on TpT.  At this point, you can also publish your Boom cards on the Boom Learning site.

Step 6 – Creating Teacher Notes for TpT Listing

Since you can’t actually have the Boom cards as a download for TpT, you need to create a file that explains how the teacher can access the Boom cards on Boom Learning.  This is what I call the Teacher Notes.  In this pdf file you can include a link to the product on Boom Learning as well as instructions on how to use the Boom cards with students.

Step 7 – Listing Your Boom Cards on TpT

If you’re an established TpT seller, you’ve already completed these steps before.  It includes creating the preview file, creating thumbnail images, and creating the product description.  When you have all these completed then you’re all set to publish your Boom cards on TpT.

Creating BOOM Cards to Sell on Teachers Pay Teachers

If this seems overwhelming to you (I know it was for me at first) then check out my TpT course on Making and Creating Boom Cards Digital Task Cards to Sell on Teachers Pay Teachers. 

This course features 16 videos and 6 supporting documents that are available for immediate download.  They provide step by step instructions to help you navigate the whole process easily.  After this course you’ll be able to create your first set of Boom cards in no time at all.

Here’s what one teacher said about the course:

“This is a fabulous resource! All the information is provided in easy to follow videos that are labeled by skill so you can go back and review a specific area whenever you want to. The narration is very clear and easy to follow. She walks you through the whole process from coming up with an idea all the way to publishing the cards and listing them on TpT. This resource is a must if you want to make Boom Cards.”

Creating Boom cards can be so much fun! I wish you all the best in your future Boom cards creation!

Filed Under: Courses, Digital Resources Tagged With: Boom cards, Creating Boom Cards, Making Boom Cards, Making Digital Task Cards, Selling Boom Cards

6 Reasons to Use BOOM Cards in Your Classroom

September 10, 2019 by Sheila Cantonwine 18 Comments

6 Reasons to Use BOOM Cards in Your Classroom
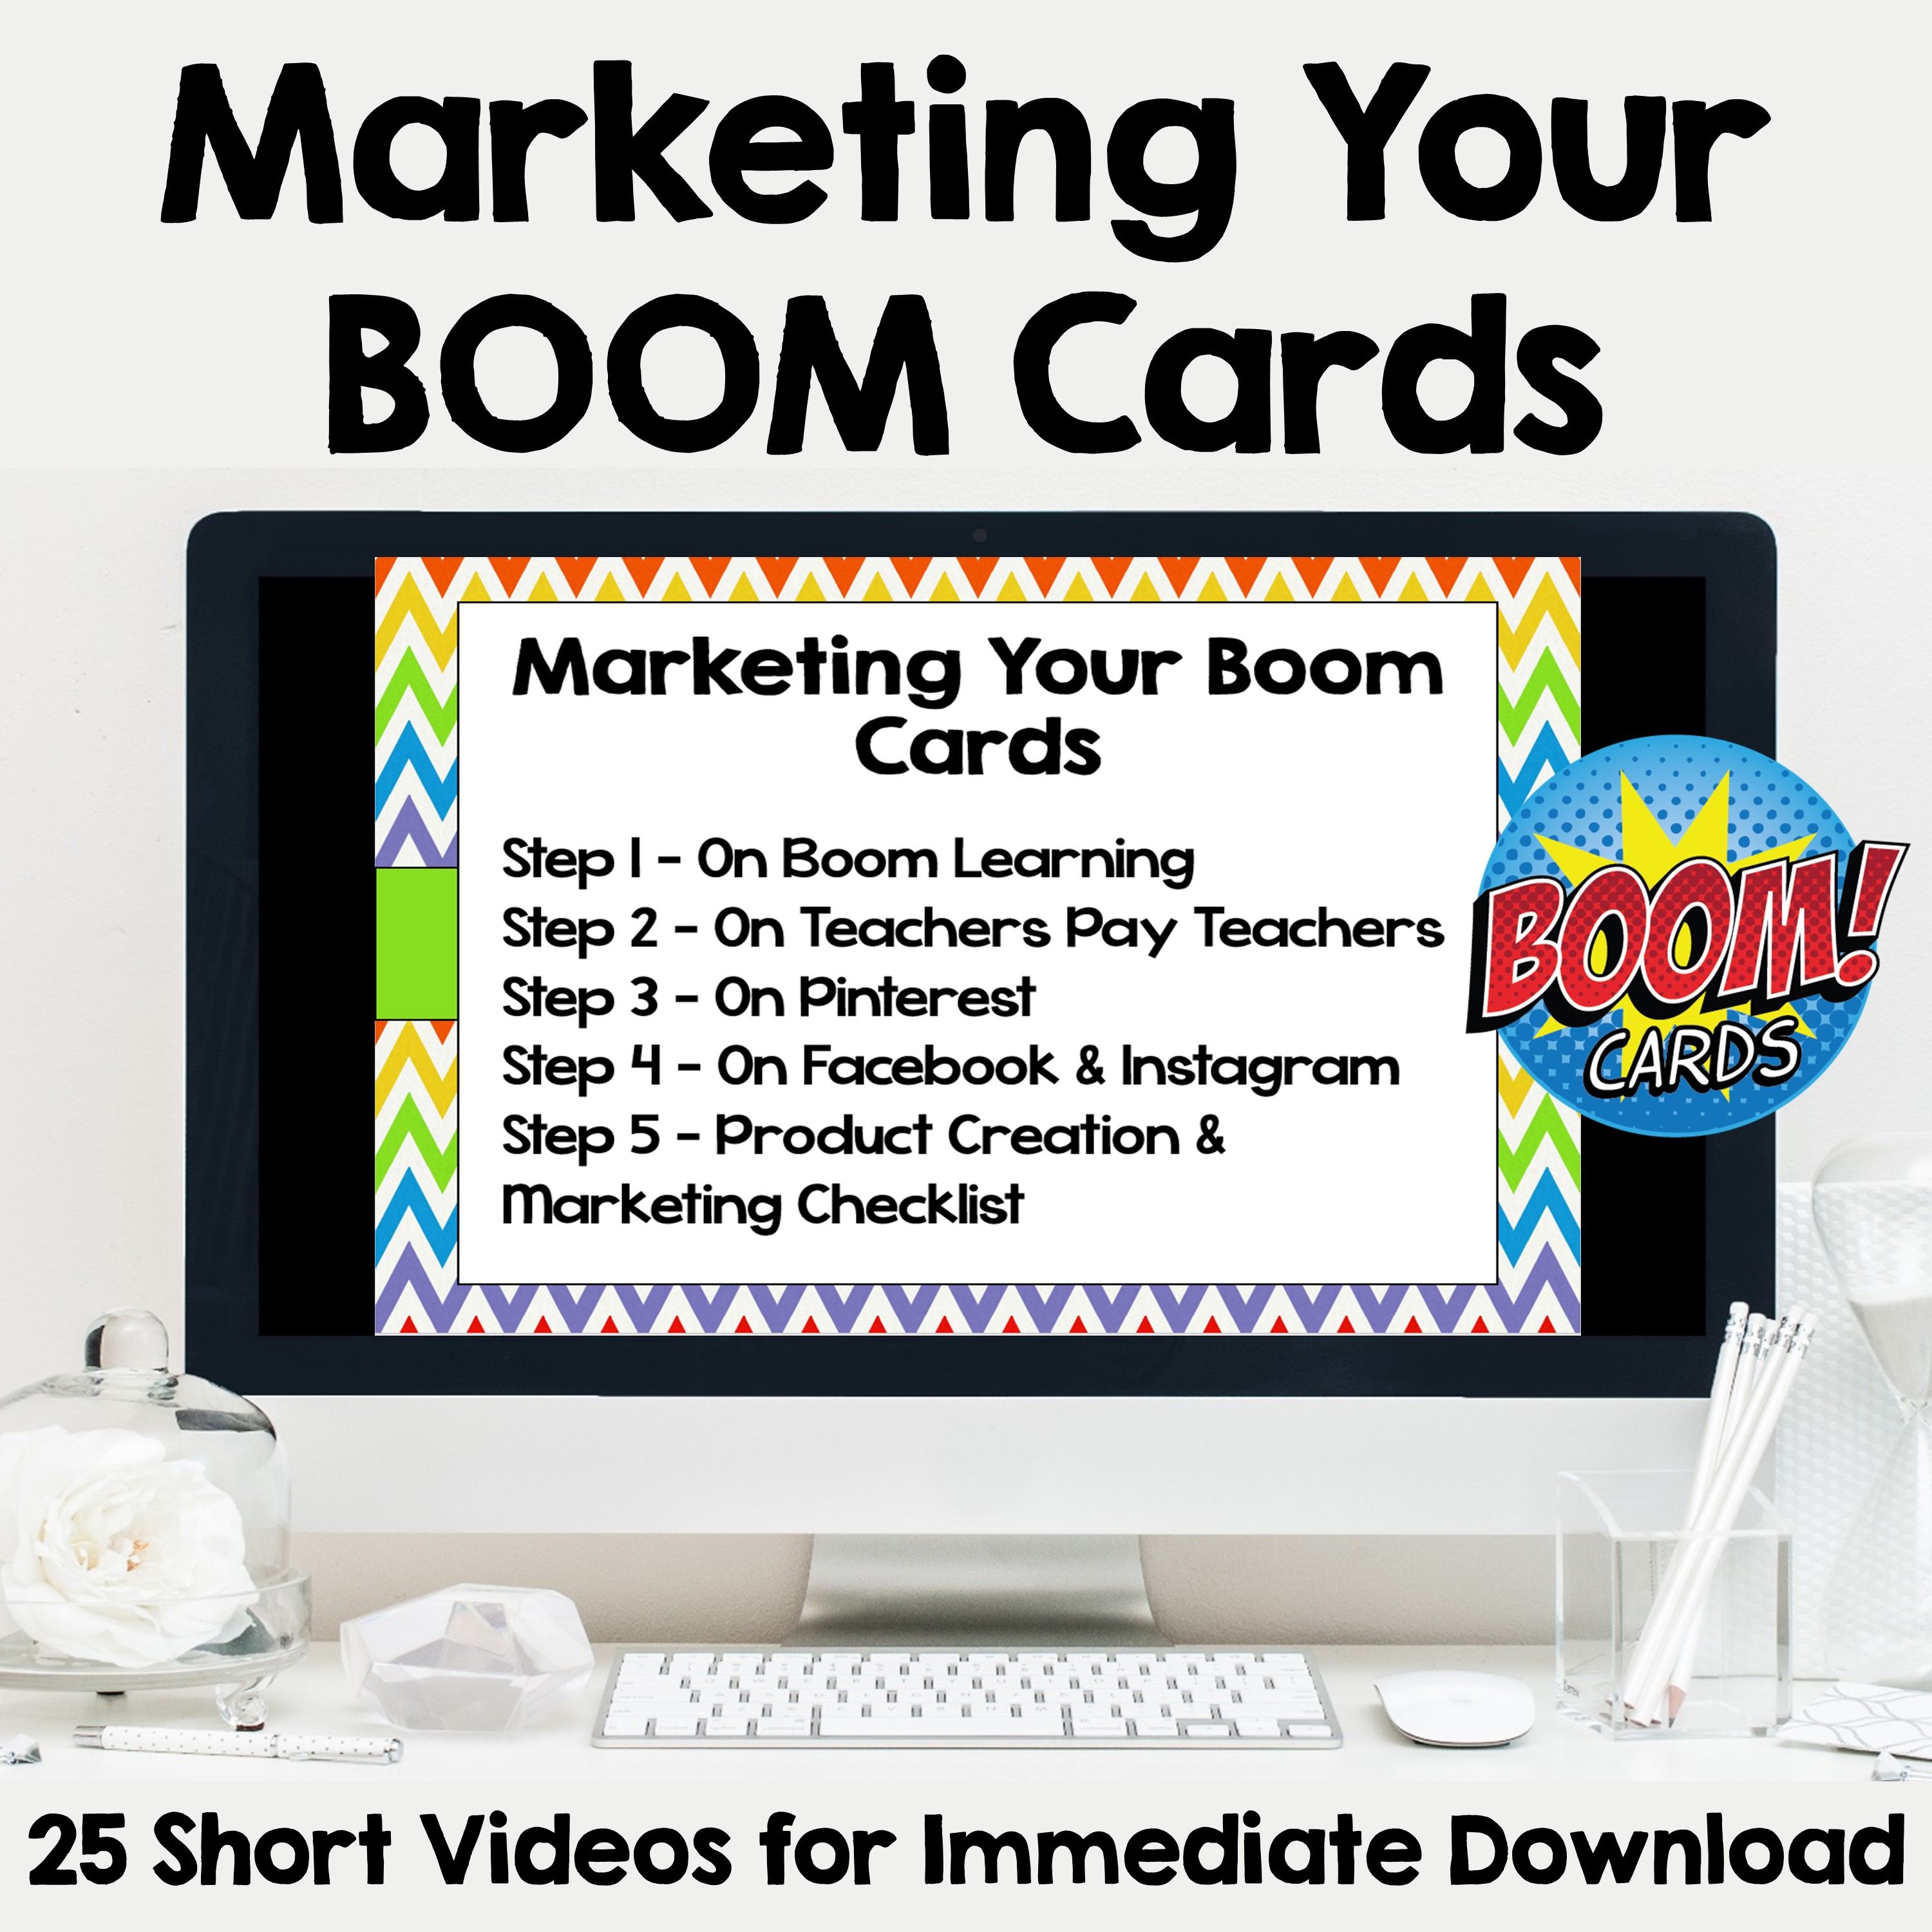
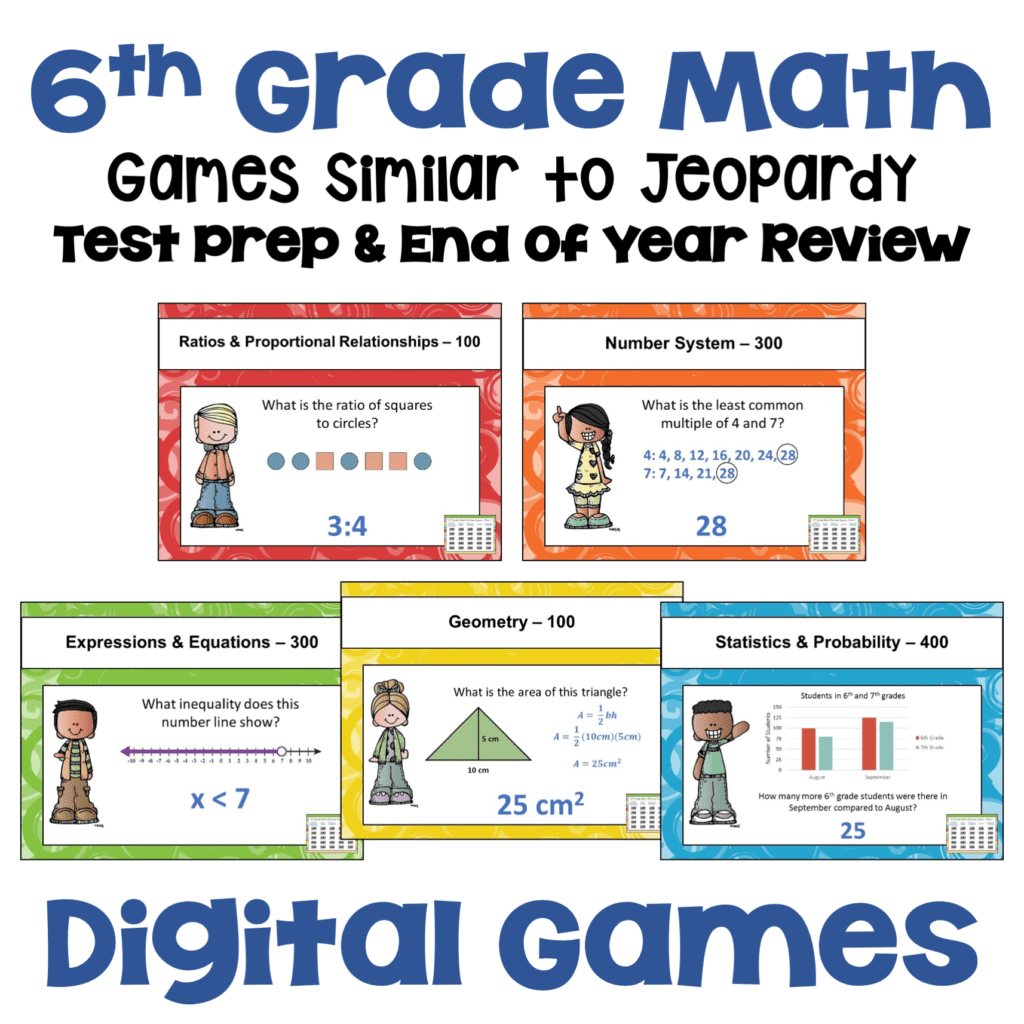
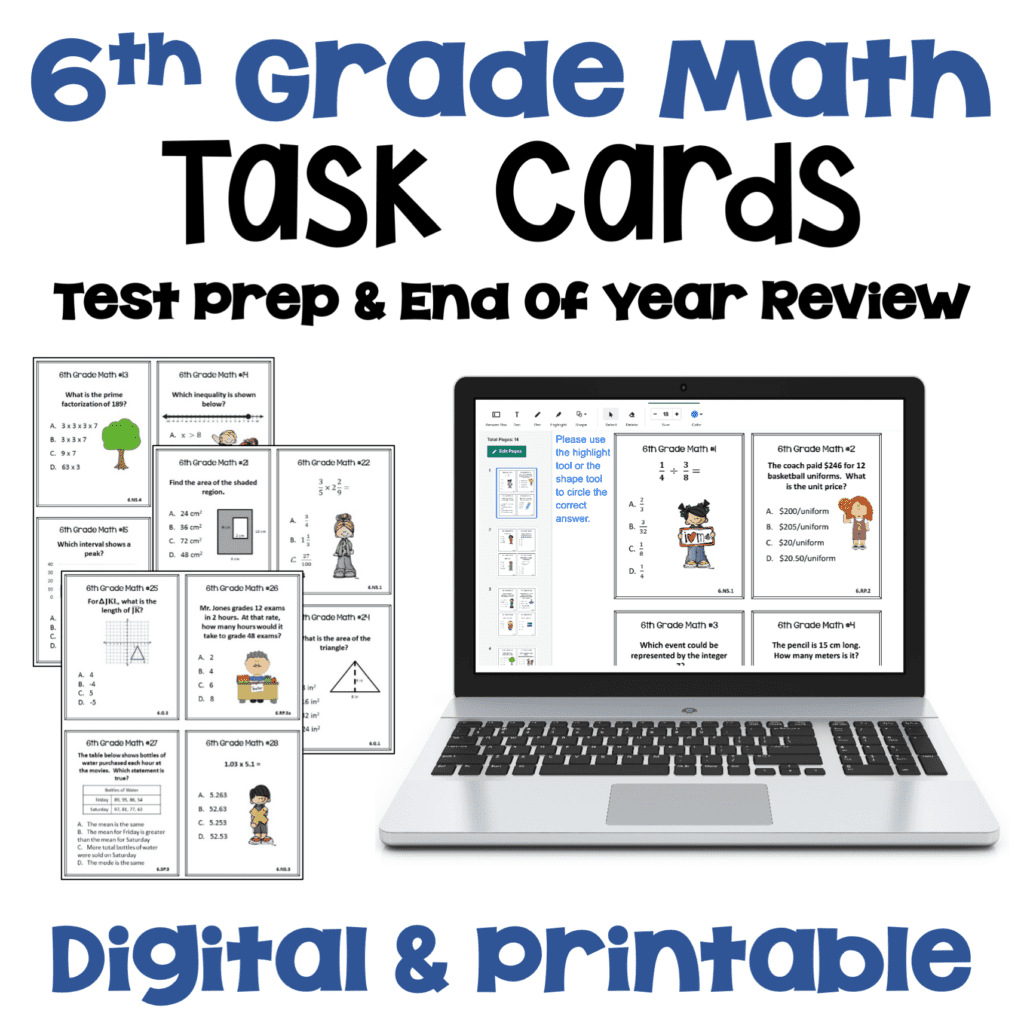
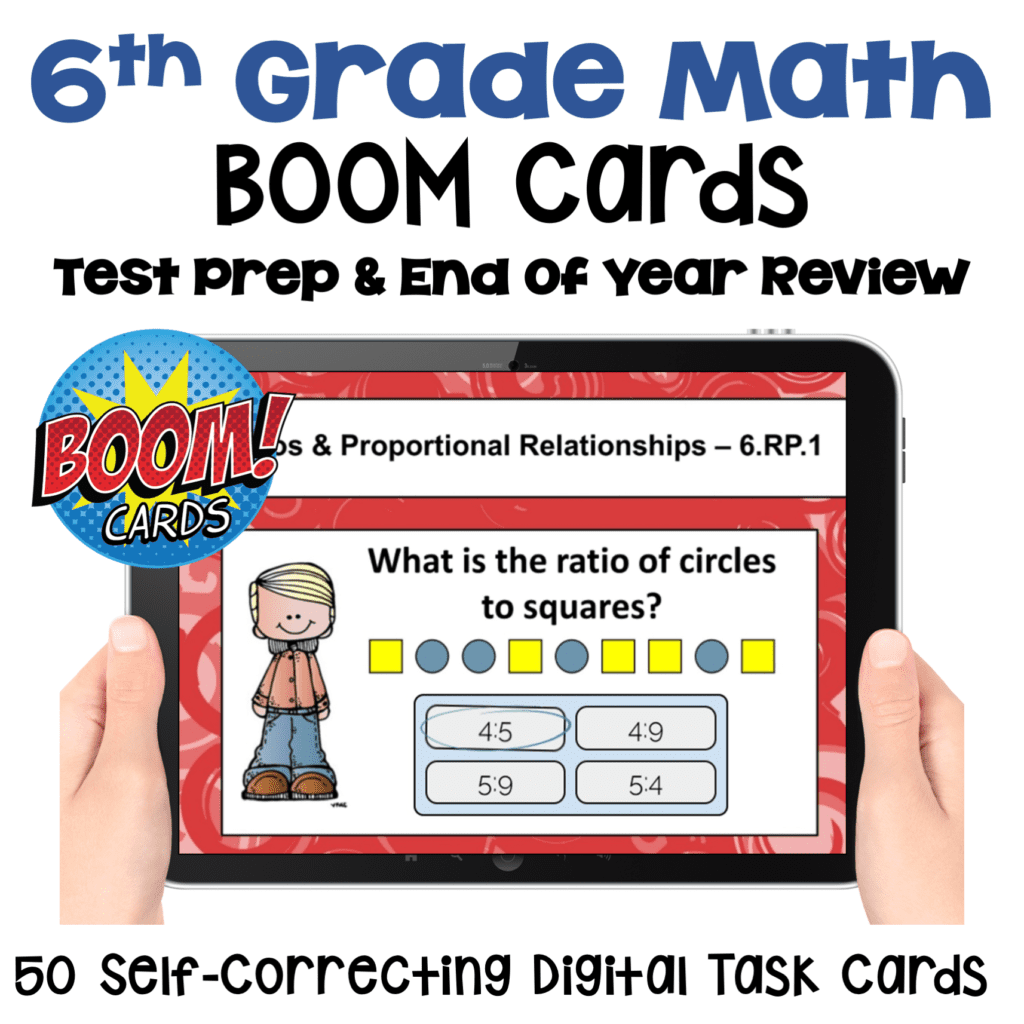
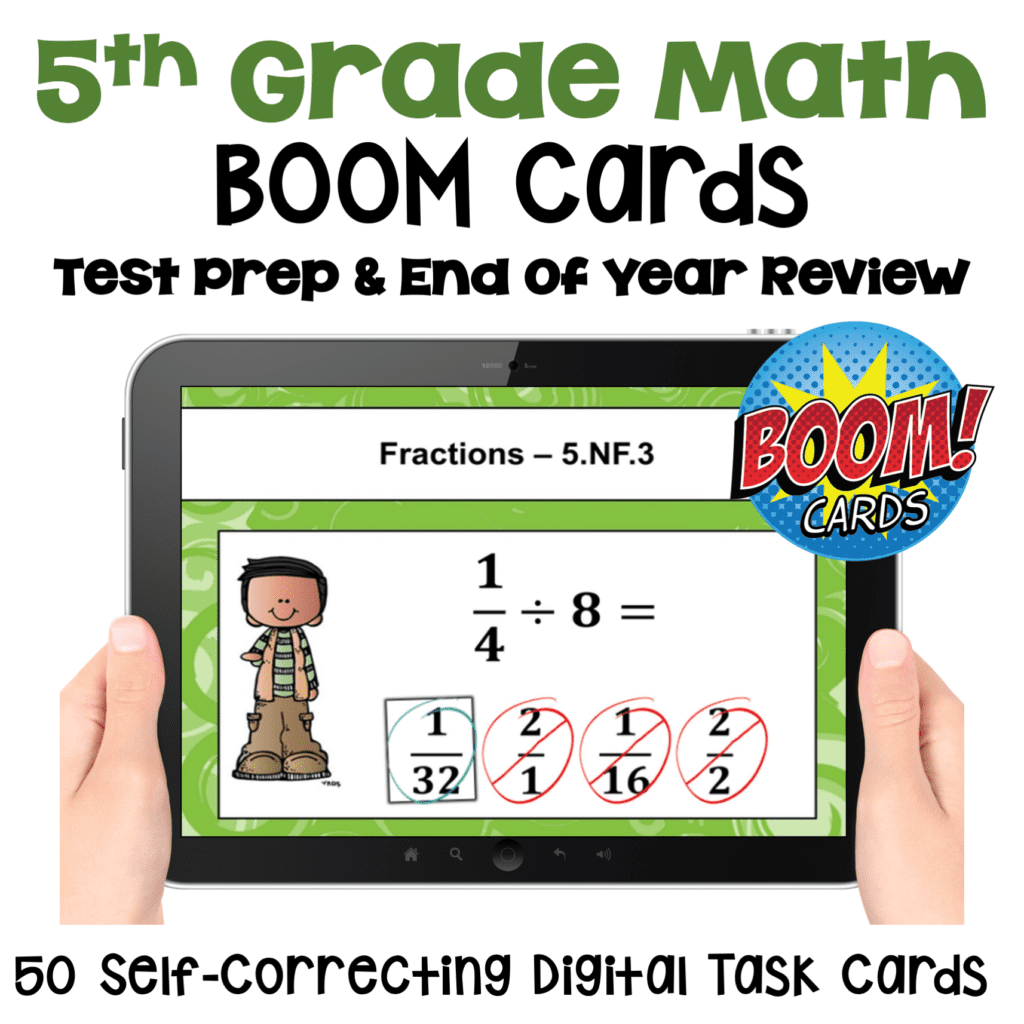
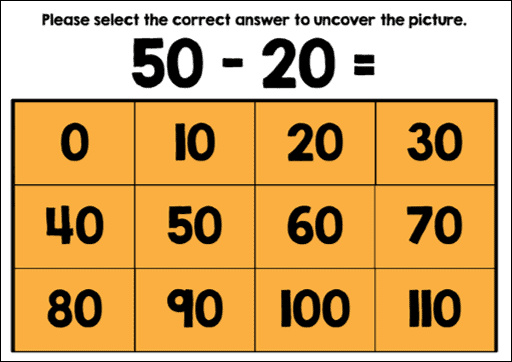
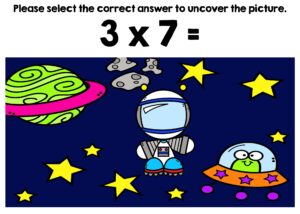
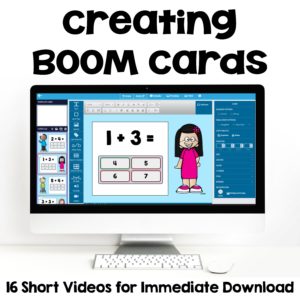
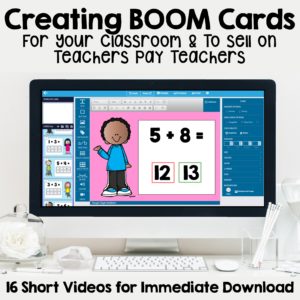
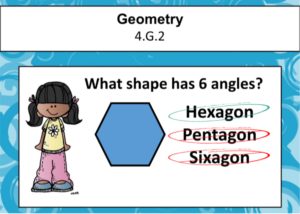
If you’re looking to incorporate more technology in your classroom, then I encourage you to try BOOM cards.  BOOM cards are digital task cards that live on the BOOM Learning website.  Students love them because they’re interactive.  Teachers love them because they are self-correcting, and you can track student data.  They are a fantastic way to use laptops, tablets, or other electronic devices in your classroom.

6 Reasons to Use Boom Cards in Your Classroom

1. BOOM Cards Are Digital.

This means they can be used on digital whiteboards, computers, tablets, or any other mobile devices.  They are a great way to incorporate technology into your classroom.  We all know how students love their tech!

4th Grade Math Test Prep BOOM Cards2. BOOM Cards Are Self-Correcting.

This is a great feature for students because they can keep selecting until they find the correct answer.  Self-correcting resources are great for students to learn from their mistakes.

For teachers, it also saves you valuable time in grading.  You can also spend time helping those students who might be struggling with questions while others are quietly working.  Students often need less support with self-correcting resources.

3. BOOM Cards Require No Prep. 

Because they are digital, you will no longer need to print, laminate and store the task cards.  All the cards are automatically stored on BOOM Learning for you.  All you need is an account on BOOM Learning where you store your decks of cards.

4. BOOM Cards Are Great for Independent Learning. 

Students love that the learning is self-paced and that they can work independently.  This means that students who struggle can take their time without feeling like they’re holding back the whole class.  Because the learning is independent, they are perfect for students who are absent from class and great for sub plans.

5th Grade Math BOOM Cards5. BOOM Cards Are Interactive. 

Unlike traditional task cards that you print, BOOM cards are interactive.  Students can listen to sounds, drag and drop, and click on various parts of the BOOM cards making learning more fun.  You can even do fun activities like Uncover the Picture, Digital Color by Code, and Puzzles.

6. BOOM Cards Allow You to Track Student Data.

Once you sign up for the BOOM Learning website, you can create classrooms with student accounts to assign decks.  As students work through a deck, you can see which questions a student answered correctly and incorrectly.  It’s a great way for a teacher to see which topics are mastered by the students and which topics might need to be reviewed.

The bottom line is that students think they’re fun, and teachers love that it saves them valuable time in the classroom.

If you’re new to BOOM, why not try some FREE BOOM cards to see how your students like them?  Here’s a free set of BOOM cards from my TpT store, and you can also search for many other FREE decks on TpT and/or BOOM Learning.

Order of Operations with Decimals BOOM Cards

If you’re interested in creating your own boom cards either for your students to use in class or to sell on BOOM Learning and TpT, check out this class on Making and Creating BOOM Cards Digital Task Cards to Sell on Teachers Pay Teachers.

Making & Creating BOOM Cards to Sell on Teachers Pay Teachers

Filed Under: Digital Resources Tagged With: Boom cards, Digital Task Cards, Using Technology in the Classroom

Primary Sidebar

About Me Image

I love helping teachers everywhere by providing quality resources and practical tips for the classroom. I know how stressful teaching can be and I'd love to make your job just a little easier.

All the best, Sheila

  • Email
  • Facebook
  • Instagram
  • Pinterest

Search

Recent Blog Posts

Infuse Magic & Merriment in Your Classroom with Christmas Bingo

A Christmas Multi-Digit Multiplication Bundle They’ll Love!

Thanksgiving Dinner Math Project – Based Learning for Grades 5-7

Free fraction worksheets

Free Fraction Worksheets

Footer

  • Email
  • Facebook
  • Instagram
  • Pinterest

© Sheila Cantonwine 2024 | Privacy Policy & Affiliate Disclaimer

Copyright © 2026 · Foodie Pro Theme on Genesis Framework · WordPress · Log in